Designing Sally Servo - The Really Robotic Robot


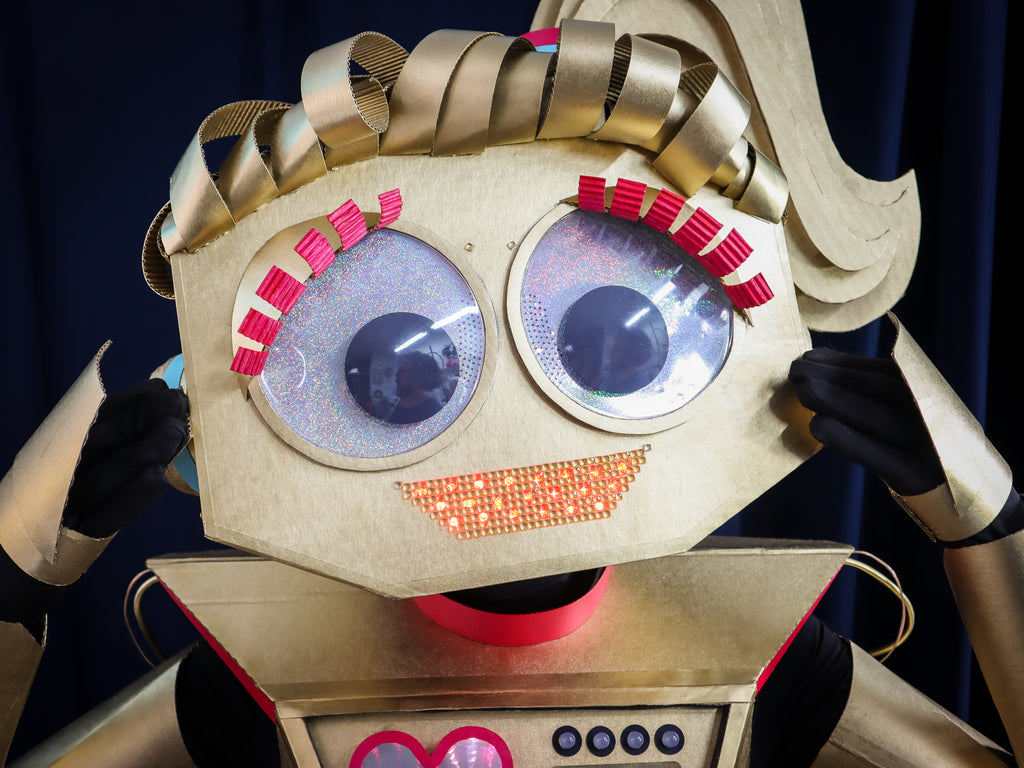
Meet "Sally Servo", the cardboard robot costume that I designed for Brown Dog Gadgets. Our goal was to inspire makers not just make a typical cardboard robot costume - but to use simple electronics to make that costume really robotic.
So, I designed 6 projects that could stand alone or be incorporated together into any cardboard robot costume - with beginners in mind. Here are the tutorials showing you how to make each:
Read the 6 tutorials hereThis post is about THE DESIGN of the costume.
In this post, I'll share the design considerations and process I went through, as well as how I made this cardboard robot costume. My design goal was to make her a feminine shape without making looking too "sexy" like many of the female robots in historical media. However, I took inspiration from many of our favorite robots and interpreted their features through a youthful, feminine lens.
The Whole Process
A timelapse is worth a thousand pictures, because it is! I wanted to share the whole process so I set up my time lapse camera. Here, you can see every step of the creation process.
Continue reading the post to see still photos and takeaways that I learned from the build.
The First Prototype
I put together a "quick and dirty" prototype with some cardboard scraps. My initial design looked too much like "armor" and not enough like a techie robot, so I learned a lot.

Building the Robot Chestplate
The plan for the chestplate and top was to make a structure that could house the electronics and bare the midriff where I would add cables like C-3P0. This would allow me the comfort to move around, and having the costume in 2 pieces would make it easier to work on.


I prototyped the shape, constantly trying it on to make the proportions right. I learned that the femininity of the figure could be enhanced by slightly angling the center panel, and making sure the sides around the waist are angled in to suggest an hourglass shape. I had originally planned one more electronic project for the center front panel (the big white rectangle), but removed it because the panel was too large and it was interfering with the elegance of the figure.

Shaping the Cardboard Robot Skirt
To create the skirt, I started with thick band around the hips. I made this piece larger than my hips to allow for the cables to have room, and wiggle room is very needed when all the panels are flat!
I continued to hang panels off of the main piece and experimented with the angles that they would spread out at before creating the faux pleat pieces that were then glued behind.


Making the Cardboard Robot Face
I really wanted my robot to have glasses, so I cut out a pair that matched the googly eyes that I would eventually use. I experimented with different robot mouths and eyelashes.


Making Robot Hair from Cardboard
I have always admired the big foam wigs that people have made out of craft foam and I wanted to use the same technique for this robot.
To make the robot hair/wig, I removed one side of the cardboard, cut even strips the width of my ruler (to make it easier!) and glued the strips around the "hairline".
Then, I chose a place for the ponytail and glued the center of an old roll of tulle in place. I manipulated each piece of robot hair to end a that location, trying to sculpt each piece so that it looked natural.
I made a template of the ponytail hair out of paper first to gauge the proportion and then I created it out of cardboard and glued it together.


Robot Arm & Leg Covers
I created covers for the arms and legs with thin cardboard with one side of the paper removed.
I had originally thought that using straight lines would look pest (arm on the left in the first photo), but it turns out that since a circular curve looks like a straight line from the side, the curved edges gave it both a feminine feel and looked also complimented the angular nature of the costume. (arm on the right in the first photo). Also - fun fact! don't the arm pieces look like french fry containers? Haha!


Color Choices and Spray Paint Tests
I wanted to find a unique identity for my robot, so I considered painting her rose gold. I ended up purchasing three colors of spray paint to test. It turned out that the regular old metallic gold looked so terrific when photographed that I HAD to go with it, so the metallic gold had won, well, the gold!


Spray Painting the Cardboard Robot
Here are some shots from the spray painting. I placed a foam head on a small lighting stand, then put the tarp over it, then placed the head on top of that. This kept it upright while spraying and prevented the stand from getting spray paint on it.


Adding the Electronics
After the spray painting, I could add the electronics projects. You can see how I did that with the full tutorials, here.


Planning the Embellishments
At this point I had a sort of "blank slate" of gold spray painted robot and I needed to make a plan for the overall look of the finished project. I photographed the project and doodled on top of it in Procreate on my iPad so that I could "play" with ideas without risking ruining the project.


Add the LED Belt
Now that I was sure of my color scheme, I created and attached the LED belt. You can see the full tutorial showing how to make it, here.

A Really Time Consuming Detail
I thought that the control panel needed some depth, and in a late night moment, I decided to recess it into the chest piece. I do think it was a good idea - but I didn't consider the amount of work it would take to do so! I placed it inside the frame and lined the edges with black paper.


Face, Mouth, and Glasses?
I experimented with the mouth shape and materials. One thing that I wanted to make sure of was that the robot's lips and or mouth didn't draw too much attention. I was already planning gigantic eyes, and so the lips needed to be more subtle (or as subtle as you can be with LED lights!). I fell in love with these sheets of square rhinestones from the craft store. They are semi-transparent and can be made more see-through by removing the silver mirror backing, which I did.
As for the glasses - I wanted the robot to have glasses so badly! I tried different colors and placements, but in the end they needed to be edited out. There was the possibility of glasses working - but if you've ever picked out glasses for your own face, you know that very small changes in the frame can make a huge difference in how they look on you. That was a game that I didn't have time to play during this build, so I had to find another way to accentuate the eyes.


Pink Robot Eyelashes
One way to draw attention to the eyes is to make them pink! This was the trick I needed to make the eyes pop. In hindsight, I would have made the pupils and eyelids a bit larger had I known I was going to decide against the glasses. With a time machine, there would always be something that I would change with every build! :-P


Electronics - Putting it All Together
To incorporate all of the electronics projects into one costume, I routed the Maker Tape from the LED Circuit, the wires from the Infinity Heart, and the wires from the Whimsical Gauge to the back of the costume, where I also added a battery pack.
For the head, I connected both the wires from the LED mouth and the two servo motors for the eyes to one Bit Board and micro:bit and also added a battery pack.


Details
I used black paper to add details to the LEDs on the top and on the belt.


Wires, wires, everywhere!
This was a fun one - using wires for decorative purposes!
I ran two black ribbons about 12 inches apart across my table and glued an assortment of speaker wire, ribbon, old usb cables, and other "wire-like" objects in place. Then, I sewed the lattice to a black bodysuit.


Making the Costume Wearable
Velcro was the perfect material to use to connect all of the components together. The closure is velcro on the back of the top and the skirt, and I also used velcro to connect the arms and legs to the bodysuit.
Here's how I put it on:
Once I put on the black bodysuit with cables attached, I add the panels to my legs with velcro, I slip the top over my head and secure the velcro in the back, then I open the skirt and place it around my hips securing it with velcro. I put on the arm pieces, place the mask over my head, and add the hand covers as a final step.


