


My Epic Journey To A Blinky Bike
In this video I tell the whole story about how I built my LED bike - the idea, the prototypes, the animations, the setbacks, the code - the everything.
This project inspired my "Creative LEDs" tutorial series. If you want to learn how to make your own custom LED animations and projects, start watching my series here.
Design Goals
As a designer, I was rarely inspired by LED projects because they can look tacky tacky tacky. But in the case of my local light-up bike rides, the whole point was to be big, bold, and flashy! So, making an LED bike was finally the right use-case for me to explore NeoPixel LEDs as a creative material.
LED projects look cheap when the pixels aren't placed thoughtfully - like my LED fur vest - it's an off-the-shelf product and has large splotches of dark throughout the vest, so it doesn't look very good. I wanted to do better.
Since I like design with simple shapes and lines, I decided to configure my LED strips to create the classic silhouette of the bicycle frame - just in lights. I wanted to put in the work to make my project to look purposeful, dynamic, and clean.


Choosing LEDs
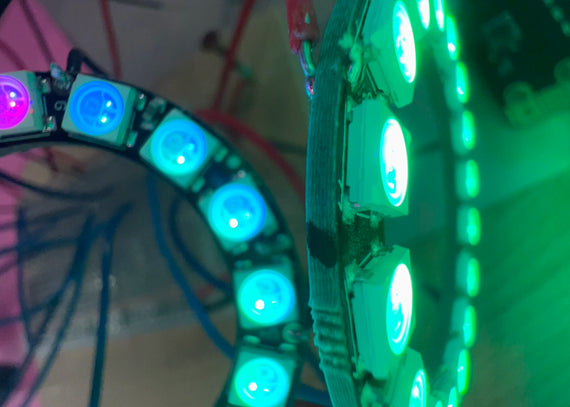
I wanted to define my bike as being a "pixel bike" by not diffusing the LEDs at all.
So for my LEDs, I chose 30 pixel per meter, waterproof NeoPixel strips. (Common pixel densities are 144, 60 and 30 pixels per meter). My bike will be viewed from far away, and I wanted each pixel to be perceived separately even at a distance. So having less pixels is a win-win-win: it’s cheaper to cover the bike, consumes less power, and gives me that "individual pixels" aesthetic.


Fabrication
I started by measuring the bike and creating a map of the lengths in my notebook.


I chose to create three continuous strips on each side of the bike, cutting two of the strips in the middle and making joints by soldering 3-wire cable in between pixels to continue the line in a new direction. (Labeled A, B, and C, in photo 2)
The plan was to connect each strip and it’s mirror image to the same pin on the Arduino, so I had 3 sets of “twin strips” of LEDs to control. (And I also added one more strip on the handlebars, for a total of 4 microcontroller pins - more on that later.)
I chose to attach the LED strips to rope light channels so that I could “draw” the straight lines of the bike silhouette even in places on my bike that were curved. I placed the LEDs inside the channels and added some heat shrink to keep them in place.
Then, I used velcro cable ties to attach the strips to the bike so that I had a strong but removable connection.


The Wheels


The First Arduino Controller, and Music Reactivity!
I started with the examples from an Arduino library named “Fast LED” to get my pixels turned on and animating super fast, then added a number pad to let me select the animation, and put it all in a box powered by a USB power pack. I also experimented with making the animations sync to music.

Natasha's LED Bike, Version 01
This was version 1 of this project (the Arduino Version).


Switching To micro:bit
In Version 1, I used the Arduino Nano 33 IOT to communicate between the main controller and the wheels, but was having trouble getting the radios to stay connected.
BUT THEN…. I discovered that the micro:bit and MakeCode interface had a super simple and very reliable radio. I also knew that I wanted to teach my bike club how to create their own LED light setups, so block coding was the way to go to introduce absolute beginners to coding NeoPixels.
So, I switched the whole project over to micro:bit.


Building A New Controller For micro:bit
I would need to re-do the NeoPixel strip connections, so I used it as an opportunity to switch to connectors that were more durable and waterproof. I soldered all of the new connectors to a proto-board with resistors to smooth out any spikes in the data line. (This is recommended by the Adafruit NeoPixel uberguide.)
I wrapped all of the connectors in a huge piece of weather resistant heat shrink to make one big durable connector. Then, I soldered all the connections to the pimoroni pinbit breakout board which I chose for it’s small form factor. I also added a small 8-pixel NeoPixel stick to display the current animation so I could see what animation was playing while riding my bike.
I laser cut a few pieces of acrylic to house the micro:bit, neopixel strip, breakout board, and my lipo battery. Plastic standoffs hold the pieces together, and I added a velcro loop to attach the whole assembly to the bike.
To my surprise, this controller is the part of the bike that I get asked about the most - the tiny LED stick illuminates the acrylic and it looks really cool from far away! I love how a design feature that I made for user feedback ended up being an aesthetic win too - what a happy accident!


MakeCode for NeoPixels on micro:bit
In Microsoft MakeCode, I named each of the 4 strips after the pin they were connected to and set them up as a NeoPixel strip with the number of LEDs on each. I also created ranges of LEDs - that’s helpful when you want to animate part of a strip separately from the rest.
Using Hue, Saturation, and Luminosity instead of the built in color picker let me set and change the color using the numerical hue from the color wheel, and playing with changing the luminosity lets me animate the brightness of the LEDs and make fades, comet and wave type effects.
I also defined my favorite colors, and made a color chart for my bike group so that we could explore creating animations that show the same color when we sync up. You can see this chart on my blog.
Just like in my tutorial series, I experimented with different animations and organized them into functions so that I could select the animation using the built in micro:bit buttons on the controller. To learn more, check out my Creative LEDs video series.


My NeoPixel Helmet
I added one more piece to the puzzle - my helmet! I originally used my white helmet and added string NeoPixels inside each of the holes.
The helmet was also the perfect starter project that I could use to teach NeoPixels to my group, and to you (did you watch it yet? check out my tutorial series!). Wrapping a single pixel strip around the helmet was not only super simple, but it would help new coders understand the “rotate pixels” block as the pixels are literally in a circle!


If you’ve ever wanted to make something with LEDs I hope you’ll follow my “Creative LEDs” tutorial series and make something awesome!

Creative LEDs is not just a series, it’s a community! Join the conversation on Discord to share what you’ve made and ask questions about how to get there.
See you there!
What’s Next for Natasha’s LED Bike?
I want to keep going with this project, so please subscribe to follow along:
Next, I’d like to create a NeoPixel jacket or cape and maybe some more accessories too! And, I want to improve on the controller, potentially adding a button matrix to make a more robust interface for changing animations. And, I want to explore more interactive animations that better utilize the radio and making the bike into a true VU meter that reacts to music!
What else should I consider adding? Let me know below!


Thanks for reading my process!
✨ Natasha


Natasha from TechnoChic
on July 18, 2024 17:31
I use this Bugani Bluetooth Speaker – I like it a lot! https://amzn.to/4bRQZRo
Yes – For now, I have it connected over Bluetooth, but I’ll probably make a wired connection when I start experimenting with syncing my animations with music. :)
Lights
on July 18, 2024 17:26
What do you use for speakers & are they connected to your phone via Bluetooth?