HEART CARD INSTRUCTIONS:
 Don't have a kit yet? Purchase one here!


 Customize your card, sign it, and give it to someone you love!
Get ready to make and give a wonderful light-up pop-up card to someone you love!
 Don't have a kit yet? Purchase one here!
The kit includes:

Required Supplies:
- Clear Tape
- Glue Stick
- Scissors
- Scrap Paper to Protect Table From Glue
- (Only if you live outside the USA:) CR2032 or CR2025 Battery
Optional Supplies:
Instructions:

Start with the heart support piece
-
Fold back and forth on each score

-
Line up a piece of copper tape on the small edge of the heart as shown
-
Using your fingernail, mark a length just before the score
-
Cut to size

-
Peel the copper tape backing about 1/2 inch
-
Align the tape with the tiny edge, making sure there is space between the copper tape and the edge of the paper
-
Remove the backing slowly while pressing the copper tape down, band-aid style

-
Check your work

-
Turn the piece over
-
Repeat on this side, measuring, cutting, and sticking
-
Again, be sure that the copper tape doesn't touch the edge or the score

-
Put down a piece of scrap paper
-
Apply glue to the end of the piece, stopping at the first score
-
Fold and glue together where the hearts meet
-
Remove any excess glue with an adhesive eraser or your finger

-
Push the right side of the paper so it folds into a box

-
Apply glue to the other end, stopping at the score
-
Fold and glue to the top of the box, matching the shapes together

-
A correctly folded heart should be able to "Dance" - (fold flat to the left and right!)

-
Open up the card
-
Apply glue to the entire bottom of the heart support

-
Fold the heart support so that the heart is leaning to the left
-
Align the support with the guideline on the back of the card
-
Glue in place, making sure the support is centered in the center fold of the card

-
Close the card, pressing down on the area that was just glued
-
Open the card, check to be sure the heart support is completely adhered and centered
CONGRATS! IT'S TIME TO CONSTRUCT THE CIRCUIT!
A Simple Circuit: Battery + Switch + LED
-
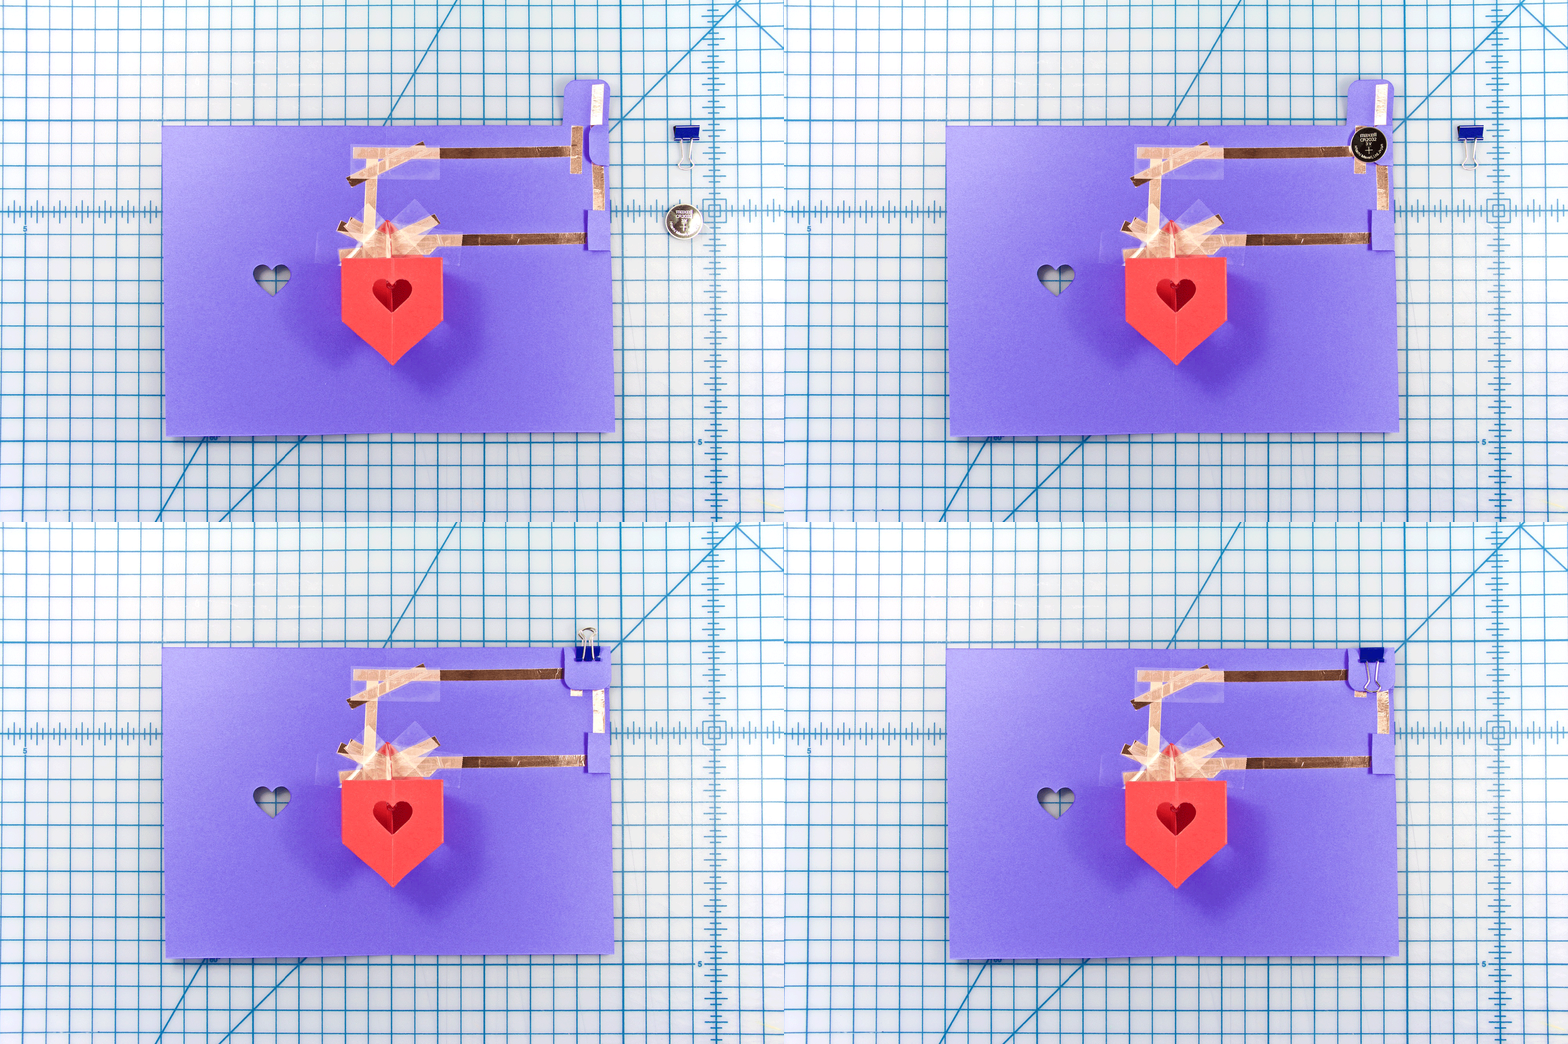
The battery will be placed on the top right corner. The positive side touches the copper tape on the right.
-
The switch is a break in the copper tape and a patch to bridge the gap when the paper is squeezed.
-
The LED is placed on the vertical structure inside the heart support with the positive side (the longer wire on the LED) on the right. Electricity travels through the LED to the other side of the paper where more copper tape continues around to the negative side of the battery.

Sweet. Now lets build that circuit step by step! (and reinforce it a bit better too!)

-
Open the three flaps on the top right
-
Measure and cut a piece of copper tape to go from the small horizontal guideline to the top flap as shown
-
Slowly press the tape into place while peeling off the backing, band-aid style

-
Measure and cut a piece from below the horizontal guideline to just before the center of the card
-
Peel and stick in place
-
Be sure this piece doesn't touch the first one

-
Measure and cut a small piece of copper tape to fit vertically on the switch flap
-
Peel and stick in place
-
Fold the tiny flaps up and down, then the entire flap over
-
When the switch flap is squeezed, the copper tape should "bridge the gap" between the first two pieces

-
Take out the LED
-
With the longer wire on the right side, place the LED inside the heart support

-
It should rest on the flat edge, with the wires over the copper tape from the first step

-
Cut three pieces of copper tape, about 1.5 inches long
-
Collapse the heart support to the left so that the LED's wire is showing over the copper tape
-
Use the three pieces of copper tape to secure the LED in place and connect it to the horizontal piece
-
Reinforce the connections with clear tape

-
Cut three more pieces of copper tape, about 1.5 inches long
-
Collapse the heart support to the right so that the LED's wire is showing over the copper tape
-
Secure with the three pieces of copper tape
-
Measure and cut a piece of copper tape to travel vertically from the LED to just below the top of the card
-
Reinforce the LED connections with clear tape

-
Measure and stick a horizontal piece of copper tape across the top of the card, stopping just before the first piece
-
Add an additional piece of copper tape over the center fold to ensure a good connection
-
Reinforce with clear tape

-
Add a small vertical piece at the top, about 1/4 inch from the first piece
-
This will serve as a place to rest the negative side of the battery

-
Fold the top right flap over to cover the first piece of copper tape
-
Place the battery on top of the flap with the "+" positive side facing up
-
Fold the top flap over the battery, securing it with the binder clip

-
Test your circuit by pressing the switch!
Didn’t light up?
- Make sure the electricity has an uninterrupted path from the positive side of the battery to the negative when the switch is closed.
- Make sure the switch makes a good “bridge” between the gap in the copper tape ( try bridging the gap with a scrap piece of copper tape).
- Check that the LED has a good connection to the copper tape, and be sure that the tape is not going over the paper to connect to the other side, creating a short circuit.
- Be sure the battery is installed with the “+” facing up – if the circuit works with the negative side facing up, the LED is in the wrong way and needs to be installed with the long wire on the right.
- Still stuck? Give me a holler here

Review this step in its entirety first, to work quickly before the glue dries:
-
Apply glue to the perimeter of the card AND above the heart support
-
Open the blue paper and fold down the flaps
-
Close it again and put it in place on the right side of the card
-
Flatten the heart support to the left then right while wrapping the blue paper around
-
Check the alignment and reposition if needed while the glue is wet

-
Close the card and check the alignment on the outside, adjusting if necessary
-
Clean any excess glue with an adhesive eraser or your finger
-
If you wish, open the card and clean any excess glue from around the letters

-
Place a piece of scrap paper under the flaps
-
Apply glue, especially at the bottom edge
-
Glue the flaps in place under the heart support

-
The small blue piece of paper is the LED cover - Apply glue to the two outer rectangles as shown
-
Fold the piece in half with the glue on the inside
-
Place the cover over the center of the heart support structure, squeezing firmly

-
Make sure the cover is aligned nicely with the base of the card

-
Apply glue to the large heart then place the transparent heart on top
-
Turn the glued piece over and remove any excess glue
-
Fold the heart in half with the transparent piece on the outside

-
Apply glue to the entire top of the heart support, especially around the edges
-
Align and glue the large heart in place
-
Fold the heart flat and press firmly in each direction to be sure the heart is attached at the edges

-
Close the card and press firmly where the heart is
-
Reopen it; be sure the structure is still intact and aligned

-
Locate the switch with your finger
-
Apply glue to the small heart, then place it over the "sweet spot" of the switch
-
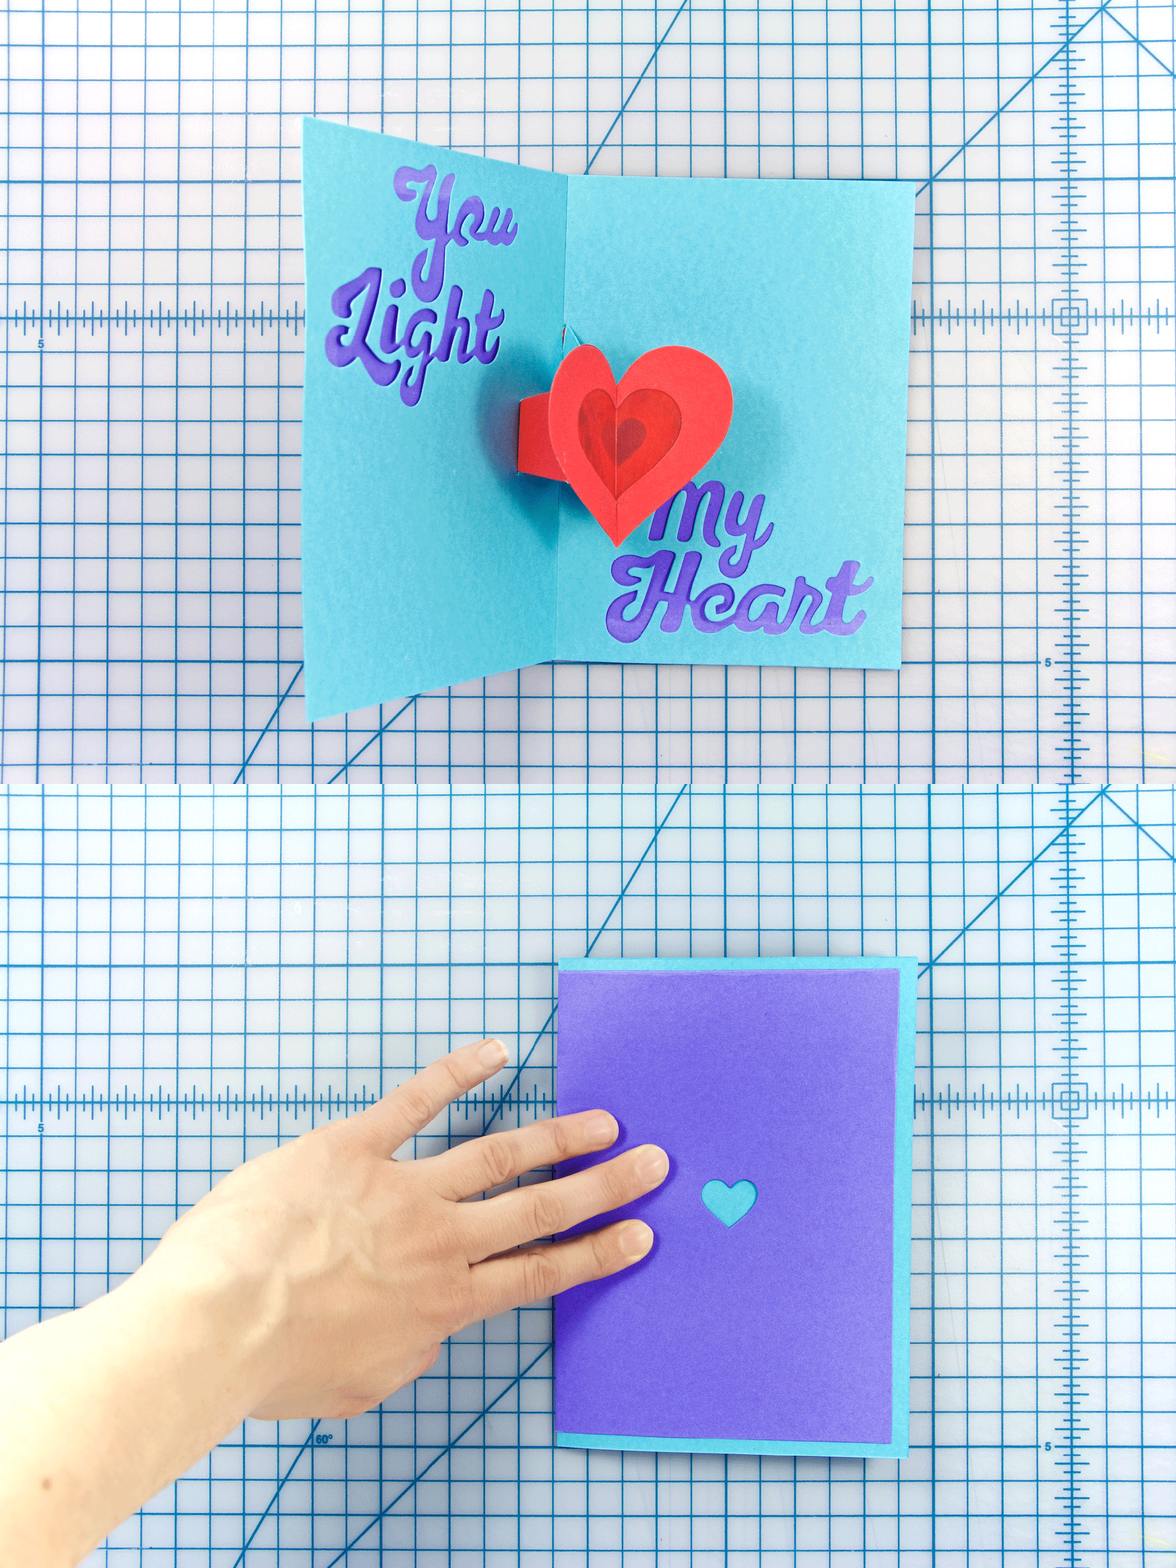
Admire your light-up creation!
 Customize your card, sign it, and give it to someone you love!
- Have fun!


