


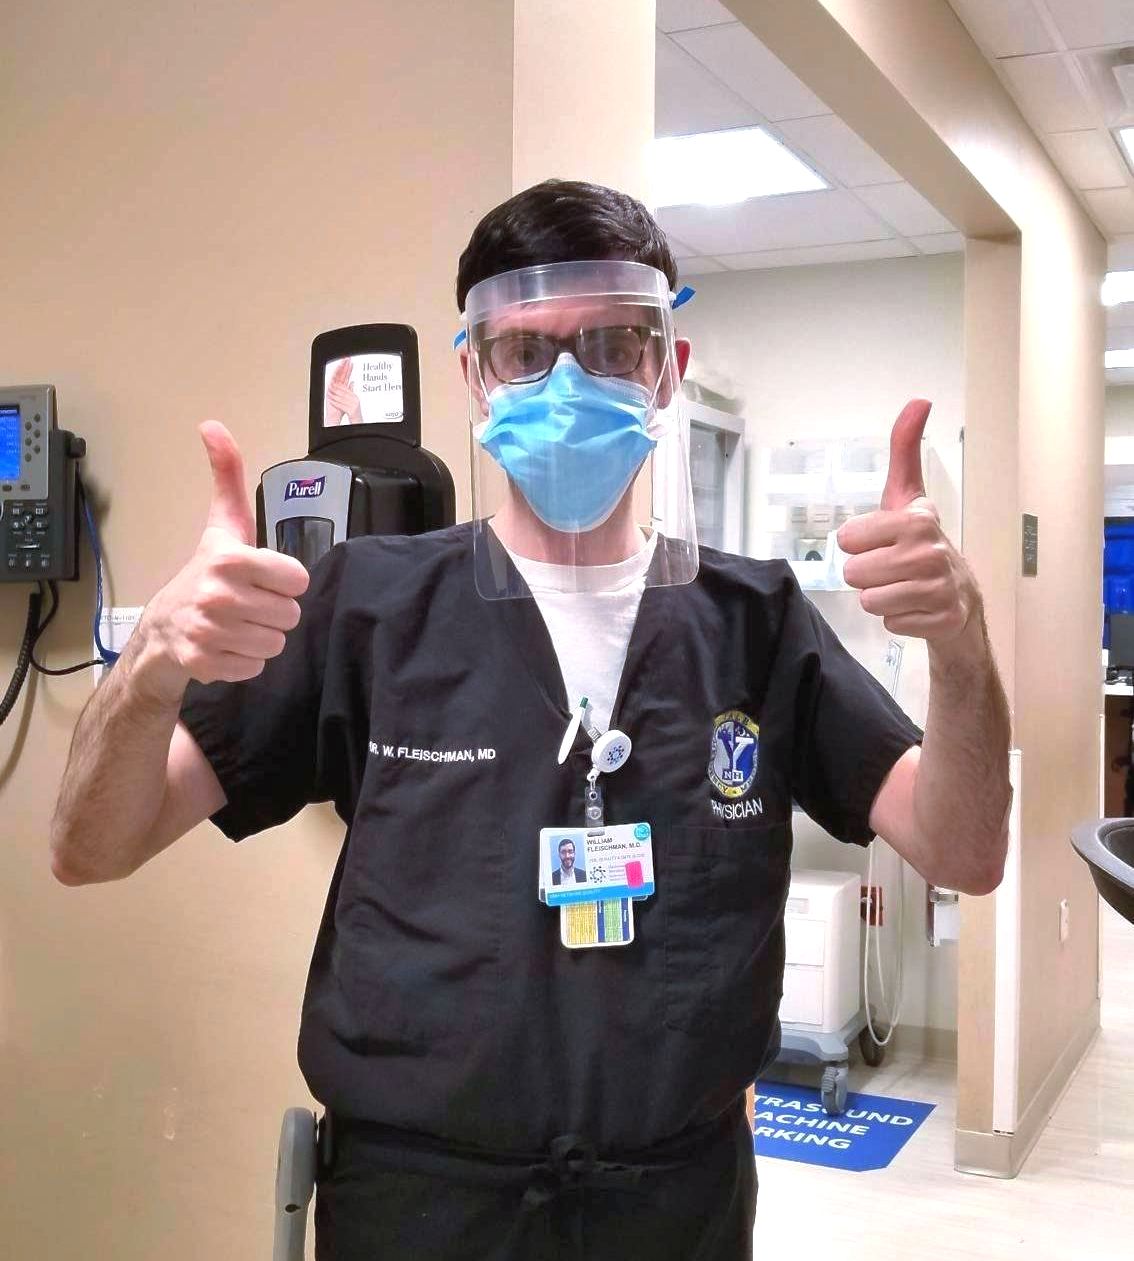
It started with a group of neighbors who wanted to help with the shortage of Face Shields in our COVID-19 testing facilities and hospitals.
We came together to design, fundraise, manufacture, and distribute the JC Face Shields - all while following social distancing guidelines so that we could safely produce shields in one of the USA's hardest hit locations.
Our design is durable, reusable, quick to make, and only requires basic tools. This means that makers can produce the Jersey City Face Shield design at a faster rate, and medical staff can clean the all-plastic design and reuse them instead of throwing them away, reducing waste and the need for larger quantities.
We hope that by sharing our designs and process below, more makers can support the needs in their communities too.
Looking to buy a pre-cut face shield? We have that too!
What are Face Shields and why are they needed?
From the CDC - (The following was copied from the preceding link 05/04/2020:)
"Face Shields: Provide barrier protection to the facial area and related mucous membranes (eyes, nose, lips) and are considered an alternative to goggles. Face shields are not meant to function as primary respiratory protection and should be used concurrently with a medical mask (for droplet precautions) or a respirator (for airborne precautions) if aerosol-generating procedure is performed. They should cover the forehead, extend below the chin, and wrap around the side of the face. "
Disclaimer:
Please note that these are not FDA-regulated medical devices. We are working as good samaritans to fill the need of our communities where our support is better than nothing. We make no claims regarding the safety and efficacy of the PPE in preventing any disease or illness, including, but not limited to COVID-19.
About the Jersey City Face Shield Design
A note from the designer:
When I saw that our medical workers were facing a shortage of face shields, I looked at my inventory of headbands and thought "I can easily make a face shield with these!"
My first prototype was made of headbands and duct tape. Then, our local hospital told us that they were having to re-use "one-time-use" shields and they were deteriorating quickly. So I looked for materials that could be completely sanitized and re-used like screws and bolts.
My final design uses zip ties because they are cheaper, faster to assemble, and won't fall off. The design also includes an optional cover for over the top of the head and tourniquet bands as the elastic. Both the simple and covered designs can be downloaded and made with the tutorials below.
I hope these designs are helpful to support your community too.
Natasha

Simple Design

Covered Design
In the day and age of reusable PPE, these shields meet my needs. Visibility after cleaning is great, one size fits all, and they’re made by members of our community!
- Johanna, Nurse, Jersey City
Download Project Files
I want everyone who needs a Face Shield to be able to make one!
The download below contains files to make both the Simple and the Covered Jersey City Face Shield designs. It includes .PDF templates to print and cut with scissors, and .SVG files to use with a Cricut, Silhouette, or laser cutter. You may download the files free for personal use. If you can afford to, selecting to give me a tip would be greatly appreciated. :)
I offer this design under the Creative Commons: Attribution-NonCommercial-ShareAlike CC BY-NC-SA
What if I want to make Face Shields to sell? If you are receiving money in exchange for making Face Shields, please factor the small fees below into your budget to support my work. If you plan to manufacture more than 500 please contact me.
Thank you!
Materials & Where to Get Them:


You will need these four materials to make the JC Headband Face Shield:
Grafix Clear 0.007 Dura-Lar Film (At least 10 in x 14 in for the simple design and 12 in x 14 in for the covered design)
Clear Plastic Headbands (2 per shield)
4-inch Nylon Zip Ties / Cable Ties (2 per shield)
- Home Depot (Sold in packs of 40, 100, 1000)
Latex-Free Tourniquet Bands (1 band makes 4 shields)
Tools:
- To Drill Headbands:
- Drill Press
- 1/8 inch drill bit suitable for plastic
- To Cut Plastic (use one of these three options):
- Scissors & Hole Punch (1/8 inch is best)
- Silhouette Cameo / Cricut / Other Electronic Cutting Machine
- Laser Cutter
- To Trim the Zip Ties:
Sanitation Supplies:
- 70% Alcohol Prep Pad (good for removing sharpie marks)
- EPA-approved Household Disinfectant, or Bleach + Water solution (4 teaspoons bleach per quart of water)
- Non-Latex Gloves
- Face Covering / Face Mask
Packaging:
- Large Plastic Bags
- Cardboard Boxes
Don't have everything on the list? See our alternate materials tutorial below.
Project Tutorials
We intend these tutorials to be helpful for individuals wanting to make a the Jersey City Face Shield for themselves or a family member, and also for teams of volunteers looking to produce them to donate to local medical staff in need.

How to build the Face Shield
An overview of building the face shield from downloading the files to completing the build.

Making Shields as a Team
How to produce large quantities of face shields while following health guidelines and social distancing.

Alternate Materials & Tools
Don't have everything on the list? Here are some alternate materials and tools that you can use to make your own face shield.
Read Now
Follow the tutorials below to make the Jersey City Face Shield. The simple design uses less material, is simpler to make, and leaves space between the two headbands. The Covered Design extends over the top of the headbands to create an added barrier of protection over the forehead.
Simple Design Tutorial Video:
Covered Design Tutorial Video:
Tutorial Instructions:
Make either the Simple Design or the Covered Design with the tutorial below:
Step 1: Download the Project Files / Template
If you haven't already, download the files here. The download includes .PDF files to print and cut by hand, or .SVG files to use digital fabrication equipment like a Cricut, Silhouette or laser cutters.
Step 2 (Hand Cutting): Make & Trace the Templates
*If you are using a Cricut, Silhouette, or Laser Cutter, skip to Step 3b.
Print and cut the .PDF templates and follow the instructions on them. Note that the headband template is the same for both the Simple Design and the Covered Design.
Headband Template (for both Simple and Covered designs):


1) Print template on thick paper or card stock
2) Cut out pieces A1, A2, B1 and B2
3) Tape pieces A1 and A2 together, and pieces B1 and B2 together along the straight edge
Simple Design Template:


Covered Design Template:1) Print template on thick paper or card stock
2) Cut out piece 1 and 2 along the outer edge
3) Tape piece 1 and 2 together along the straight edge
4) Use a 1/8 inch hole punch to punch out the small holes (preferred). If you don’t have 1/8 inch punch, punch the dashed holes with a standard 1/4 inch hole punch.
5) Use completed template to trace onto plastic with sharpie marker


1) Print pages 1 and 2 on thick paper or card stock
2) Cut out piece 1 and 2 along the outer edge
3) Tape piece 1 and 2 together along the straight edge
4) Add a paper “patch” at the bottom to complete the straight edge between the arrows (optional)
4) Use a 1/8 inch hole punch to punch out the small circles (preferred). If you don’t have 1/8 inch punch, punch the dashed holes with a standard 1/4 inch hole punch.
5) Trace the outer edge and holes onto plastic with a Sharpie marker
6) Place the plastic on top of the template and trace inner lines
Step 3: Cut out Dura-Lar


3a: Hand Cutting:
1) Cut out the Dura-Lar along the marks with scissors or an X-Acto knife, and punch out the holes with your hole punch
2) For the Covered Design, if you have a 1/16 inch hole punch, punch small circles at the end of the lines (as shown on the template) to prevent tearing
3) Use an Alcohol Swab to remove any Sharpie marker marks that remain
3b: Machine Cutting:
You will need the .SVG headband template and either the Simple or the Covered Design template.
Headband Template: Cut the headband template out of card stock or thick paper. Use your machine's material settings for the card stock or thick paper that you are using.
Shield Plastic - .007 Dura-Lar: Cut the Simple or Covered Design template out of .007 Dura-Lar film. Follow the instructions for your machine type below:
Laser Cutter:Cricut or Silhouette Craft Cutters:Import the .SVG files and cut them according to the recommended material settings for your laser cutter's power and model.
We used a Trotec 80 Watt Laser Cutter on the Paper/Vellum setting.
Use a 12 x 24 inch light-grip cutting mat (the standard grip mats worked, but left a bit of residue on the Dura-Lar film). Follow the settings for either the Cricut or Silhouette machine type below:
Upload the .SVG file. Select all and click "Attach." Click "Make It." Create a custom material and set the Cut Pressure to 350 and Multi-Cut to 3x. Use a 12 x 24 inch cutting mat and Fine-Point Blade to cut the Dura-Lar.


Settings for Silhouette to cut .007 Dura-Lar (I used a Silhouette Cameo 2):
Import the .SVG files (Upgraded Software may be necessary).
In the SEND tab, select the shapes and click "Cut". Set the blade depth to 3, the Force to 33 and the Speed to 1. Choose 3 Passes.
Use a 12 x 24 in Light Tack Cutting Mat and rotate your blade depth to 3. You're ready to cut!

Step 4: Drill the Headbands


1) Use the headband templates "A" and "B" to trace hole marks onto two flattened headbands with a Sharpie marker. Headband A will have 4 holes and headband B will have 6.
The headbands can be carefully flattened to align with the templates. Be sure to move slowly so that they don't snap or spring off of the table. Wear eye protection while manipulating and drilling headbands.
2) Drill holes in the headbands where marked with an 1/8 inch plastic bit. Remove any remaining Sharpie marks with an alcohol swab.
Step 5: Assemble the Shield
First, if you are making the covered design, Close the Flaps:
1) Close the top cover by folding the center flap down and securing the two side flaps together as shown:


Simple and Covered Designs:


1) Place the headband with 4 holes on the outside of the headband with 6 holes. Align the holes on one side.
2) Align the holes in the Dura-Lar piece with the holes in the headbands.
3) Thread a zip tie through the holes from the outside of the headband going through the Dura-Lar and both of the headbands. Thread the zip tie back through the other hole.
4) Repeat on the other side.
5) Close both zip ties, making sure the Dura-Lar fits snug across the outer headband.
6) Trim off the zip tie's tail with a pair of nail clippers - this produces a smooth rounded end so that it won't catch on hair or fabric.
Step 6: Add the Band


1) Cut the tourniquet band in 4 quarters longways and width-ways so that you end up with four, 9 by 0.5 inch pieces.
2) Tie one of the quarters to the back of the Face Shield through the remaining holes.


Congrats - You Made It!
Making Shields as a Team
The tutorial above shows you how to make a single face shield, but how do you make many of them?
Enlisting the help of others is challenging with social distancing guidelines, but we must follow them! We've managed a city-wide production line to manufacture shields. This section is all about making multiple face shields for other people and working as a team to do so.
Step1: Determine the need
Your very first task should be determining who you are serving. If you already have requests, that's great! But if you're just starting out, it's important to identify the recipient of your face shields before you buy supplies. That way, you're not buying up supplies that other teams may need today.
My journey started by posting to my neighborhood's social network called Next Door, where I connected with neighbors who worked at local hospitals that were experiencing a shortage of face shields. My recommendation is to start as local as possible to uncover the needs in your immediate community and grow from there.
Step 2: Recruit Your Team
There are many tasks that go into producing face shields, and if you are planning to make a large quantity, you'll need a team. But who are you looking for? These are the jobs that team members will do:
- Organizing Shield Requests
- Raising Money
- Purchasing Supplies
- Making the Shields
- Drilling Headbands (Drill press needed)
- Cutting Dura-Lar Film (Laser cutter, Craft cutter, or scissors)
- Assembling Shields, Sanitizing and Packaging
- Distribution / Coordinating Pickup
These roles could be done all by one person or split amongst the team. We had 5 people on our core team. Team member 1 organized shield requests, member 2 raised money and purchased supplies, member 3 drilled headbands, member 4 cut Dura-Lar film, and member 5 assembled, sanitized, packaged and distributed.
However you divide the work depends on the skills and time of each team member - there isn't a right or wrong way - it's up to you! Once you have committed team, set a weekly phone or video call to plan and get everyone one the same page.
Step 3: Determine Your Scope
How many shields will you make? This depends on the limiting factor in one or more areas:
- Need - How many shields were requested?
- Money - How much can you spend?
- Time - How much time does your team have?
- Material Availability - Can you get the materials? When?
With these factors in mind, you can set your goal.
Even if your goal is large, make a small batch first. About 25 shields is a good place to start. You can purchase Dura-Lar in pads of 25 sheets and the other materials to match this quantity (remember: you need 2 zip ties and 2 headbands to make 1 shield).
While making your first batch, time yourself so that you get a feel for the process. This way, you will know how much commitment you are making to the project and can purchase future materials and recruit team members accordingly.
Step 4: Purchase Supplies
When you're ready to mass-produce, order enough supplies to make your goal amount plus a bit extra, as a small amount of the material may get ruined in the manufacturing process. We had a handful of snapped headbands and mis-cut plastics - it wasn't many - but it's good to factor this into your equation.
We've been ordering supplies to make batches of about 100 at a time. This is to assure that we are putting materials to use right away and aren't over-buying supplies in case the demand changes.
Step 5: Get to work
But first! You'll need a plan to ensure the safety of your team. Because it's possible to have the virus before symptoms start, imagine that you are carrying the virus during the manufacturing process. Take precautionary measures as not to infect your team, or the recipient of your shields.
- Disinfect all work surfaces / tools prior to working (View the list of EPA approved disinfectants here - pay attention to contact time, which is the amount of time the surface should be visibly wet.)
- Wear a face mask while working and face mask and gloves while disinfecting
- Disinfect face shield materials before handing them off to the next maker (if applicable)
- Disinfect shields before packaging for distribution
(For more, see the "How to Sanitize & Store Shields" section below.)
*And most importantly, if anyone on your team develops any symptoms, they should stop working on the shields immediately. If they want to continue to help, assign them "hands-off" tasks like organizing donations, fundraising, or coordinating project tasks over the internet.
Cutting multiple shields from Dura-lar Plastic:
Here are some options for optimizing your time when cutting many shields from the Dura-Lar plastic:
- Laser (Best!)
- Fast and Accurate
- Can cut multiple shields at once on a larger bed
- Craft Cutter (Better!)
- Accurate, but more time consuming than the laser
- Cut one at a time on a 12 x 24 inch mat
- Be sure to use a tool (not your fingernail) to carefully peel the plastic off of the cutting mat - this plastic is quite rigid and can easily wear out the skin on your finger!
- Scissors / Hole Punch (Good!)
- Slowest but simplest method
- Using a 1/8 inch hole punch is best, but if you don't have one, pay attention to the alternate punch holes in the design file.
If you're handing off the finished Dura-Lar shield pieces to another maker, disinfect the shields first.
Drilling the Headbands:
- Mark all the headbands first with a Sharpie marker, or create and use the jig available in the project downloads folder
- Remember - You need an equal number of parts "A" and "B", so be sure to count them and divide them in half before drilling.
- Drill each headband slowly to reduce "strings" that can happen by leaving small edges of plastic connected.
- If the sharpie markings are visible after drilling, Alcohol prep pads can be used to easily remove the marks.
If you're handing off the drilled headbands to another maker, disinfect the headbands first.
Assembling the Shields:
- Work on the shields in batches of about 20 or a number appropriate for the size of the table you are working on.
- Attach the zip ties first to all, then trim them all.
- Cut and add the tourniquet bands last.
Step 6: Cleaning and Packaging
When the shields are done, disinfect them using an EPA Approved Cleaner or Bleach + Water. Wear a face mask and gloves.
- Allow shields to dry completely before packaging.
- Shields can be stacked one inside the other for more compact transport.
- Pack shields in unsealed large plastic bags to protect them from scratches.
- Pack the bags in cardboard boxes for easy transport.
- In each box, include information sheet (below)
Step 8: Donating and Distribution
With the boxes packed, donate the shields as soon as possible. You'll want to include a letter with this information:
- Manufacture Date
- Materials Used
- Intended for Re-Use by one person (don't share)
- Your contact information
- Encouraging words for your healthcare provider teams!
Here is a link to the letter we used. You may copy it but be sure to change the information to reflect any alternate materials or processes that you used, and update it with your own city/team name and contact information. :)
Step 9: Celebrate!
You've made a difference and helped people. You are awesome.
Alternate Materials & Tools
Here are some alternate materials that you might use if you can't find the ones that we suggested above. These suggestions are for personal use only! We don't recommend donating shields made with these materials, but we wanted to share some ways that have worked in a pinch to make shields for personal use.
If you've tried an alternate material that works, please let us know so that we can add it to the list. Thank you!


Example: The Jersey City Face Shield Design using white headbands, screws, and sewing elastic.
Alternate Shield Plastics
Alternate Shield Plastic info from the manufacturer of Dura-Lar, Grafix:
Dura-Lar: This is polyester and is also referred to as PET or PETG – for this exercise these terms are all interchangeable. This is the best film for shields as it is durable and stable. We have seen these gauges most requested: .005”, .007”, .010” & .020”, not as requested but there is also .015”
Acetate: As usual, much confusion around what this material is, but again, for this exercise, it doesn’t matter, this material is also adequate for face shields. Popular thicknesses are .0075” & .010” - you can use .005” but tearing comes easier and you can use .020” but it is a bit pricey – we do carry .015” also.
Clear-Lay: Also suitable for this application, less expensive which is a bonus. It is NOT useful if being laser cut – we DO NOT RECOMMEND it for this process, but it's fine to cut by hand. Popular gauges are .005” .007” & .010"
Clear Craft Plastic: This material is the same as Dura-Lar/Polyester/PED/PETG - Only available in .007” & .020”
Alternate Headbands


Other headbands will work with the Jersey City Face Shield Design, but the template won't fit exactly so it may require some adjustments. Look for headbands that are flat across the top (not curved) so that they sit on top of each other nice and flush, and for headbands that are more on the flexible side than rigid.
If the headband is longer or shorter than the template, make sure that it is centered, and trace the holes. The holes near the edge of headband "B" should be close to the edge as shown, because that hole is meant to tie on the elastic band.
-
If you don't have a headband, you could cut the headband template "B" from the Dura-Lar plastic and connect it as if it were a headband. This is less comfortable, so it is recommended only for short term use.
Alternate Fasteners


Screws & Bolts - Small screws and bolts are a great option. The only downside is the potential that they could wiggle loose and fall off.
Duct Tape - With tape, you don't need to drill any holes. Use Duct Tape to connect the headbands, then secure the shield plastic to the headband on the side with another piece of tape.
Packing Tape - Same as duct tape, only it's clear and (a little) less ugly. :p
Pop Rivets - Not pictured. Our headband broke when we used pop rivets, but it worked fine for another maker. It may have to do with the type of headband used, so it may be worth a try!
Alternate Bands / Elastics


Hair Ties - Great option and easy to replace, but harder to clean because they hold moisture.
Sewing Elastic - You may have some scraps from making masks. :)
Pull Ties - These bungie cord type ties are great because they are adjustable.
Elastic Bands - Standard Office Supply
Party Balloons - Not Pictured. You know those long balloons that get made into animals? Yup - they also make great elastic bands. If you happen to know a balloon animal maker, you're in luck!
Shoe Laces - Not Pictured. Thread through the holes and tie the shoelace around your head.
Nothing - You may also choose to not have a rear elastic/tie at all - the headbands are fairly snug on their own.
How to Sanitize & Store Shields
We learned from conversations with our local hospital that the most common way to clean Face Shields is with a bleach and water solution, and to store it in a clean sealable paper bag. Plastic bags aren't sufficient because they can retain moisture and therefore harbor germs. Our local EMTs also use a UV light sanitizer.
Talk to the hospital or recipient that you are donating to about their cleaning procedures to determine if the Jersey City Face Shield is a good option for them.
We also found these guidelines from the CDC for cleaning and re-using Face Shields:
CDC - Strategies for Optimizing the Supply of Eye Protection
(The following was copied from the link above 05/04/2020:)
- While wearing gloves, carefully wipe the inside, followed by the outside of the face shield or goggles using a clean cloth saturated with neutral detergent solution or cleaner wipe.
- Carefully wipe the outside of the face shield or goggles using a wipe or clean cloth saturated with EPA-registered hospital disinfectant solution.
- Wipe the outside of face shield or goggles with clean water or alcohol to remove residue.
- Fully dry (air dry or use clean absorbent towels).
- Remove gloves and perform hand hygiene.
Material Safety
When researching a specific cleaner that you want to use, you may find these documents from the material manufacturers helpful:
Research & References
Here is a list of resources that informed our design and process:
Face Shield Design
FDA Face Shield Manufacturer Guidelines
OSCMS - Face Shield Guidelines Document
Open Source COVID-19 Medical Supply Guide
Using Face Shields
CDC - For Healthcare Professionals: Using Personal Protective Equipment (PPE)
CDC - For EMS: Interim Guidance for Emergency Medical Services (EMS)
CDC - Strategies for Optimizing the Supply of Eye Protection
CDC - Strategies for Optimizing the Supply of Facemasks
Good Samaritan Laws
Related COVID-19 Information
Recipients of Shield Donations

The Jersey City Face Shield Project Has Donated To:
- Jersey City Downtown COVID-19 Testing Site
- Christ Hospital - Jersey City
- RWJ Barnabas Health
- Jersey City Medical Center
- Hackensack Meridian Health - Raritan Bay Medical Center
- Jersey City EMT Squad
- NYC Health + Hospitals/Woodhull North Brooklyn
- Mercy LIFE at Camilla Hall, PA
- Stroger Hospital of Cook County, Chicago
- BAYADA Assistive Care Jersey City
Our Team
Special thanks to the Jersey City Face Shield Project Team members who volunteered their time to make hundreds of face shields for our community!
Thanks to Graham and the Maker Depot Makerspace for helping us drill headbands!
I look forward to hanging out with you all post-COVID-19!
<3
Natasha

Thank you to our backers!

The Jersey City Face Shield Project was funded generously by backers on Kickstarter.
Thank you for your support!
R.R.
Brett Felder
P.G.
Joan Nobile
Caitlyn Fultz
Arioch Morningstar
Brittany & John Koffer-Kelly
Martino + Yang
W.
S.T.
B.C.
ZendaZelda
Ale Suizzo - Apple Distinguished Educator
Wozzybear Enterprises 🐶
Kris Panagiotopoulos
Eric & Jenny
Nick
Tieg Zaharia
S.D.
Kathy Equality Duggan
Alex Adam from Montreal
J.B.
S.V.
&
Many more anonymous backers!
THANK YOU!
Contact Us
We have tried our best to provide accurate and useful information in this article. We would love to hear your feedback, suggestions, corrections, or additions! To get our attention please email us with these subject lines:
[ JCFS Question ]
[ JCFS Suggestion/Feedback ]
Please email us here. Remember that we are trying our best and to please be nice.
:)
Thank you!


Natasha Dzurny
on June 9, 2020 19:33
@D-A Thanks so much! :)
D-A
on May 27, 2020 09:29
Incredible effort!! This is so comprehensive.